The guide to take a screenshot is an essential thing to learn if you have ever gotten a problem of software, or sharing the image of the screen to someone.
Though several of a method which can use by pressing the Print button: “PrtScn” or “Fn+PrtScn” on computer keyboard shortcuts to take a screenshot on a Dell. However, if you don’t make sure the way to do, you can check out the following methods in this post.
What is a Screenshot?
Screen capture (or screenshot) the photo on your PC, tablet, mobile screen into a file which you can easily then save, edit, or share. This is helpful for fixing some problems on your devices, as you can show others what is on the screen currently the problem occurs.

How to take a screenshot on a Dell (Desktop & Laptop)
1. Using the Windows Built-in Screenshot Program
Print Screen (PrntScr) button
Frequently, the PrntScr key is found in the upper-right corner of the basic Dell keyboard and between the “Insert” and “Delete” keys.
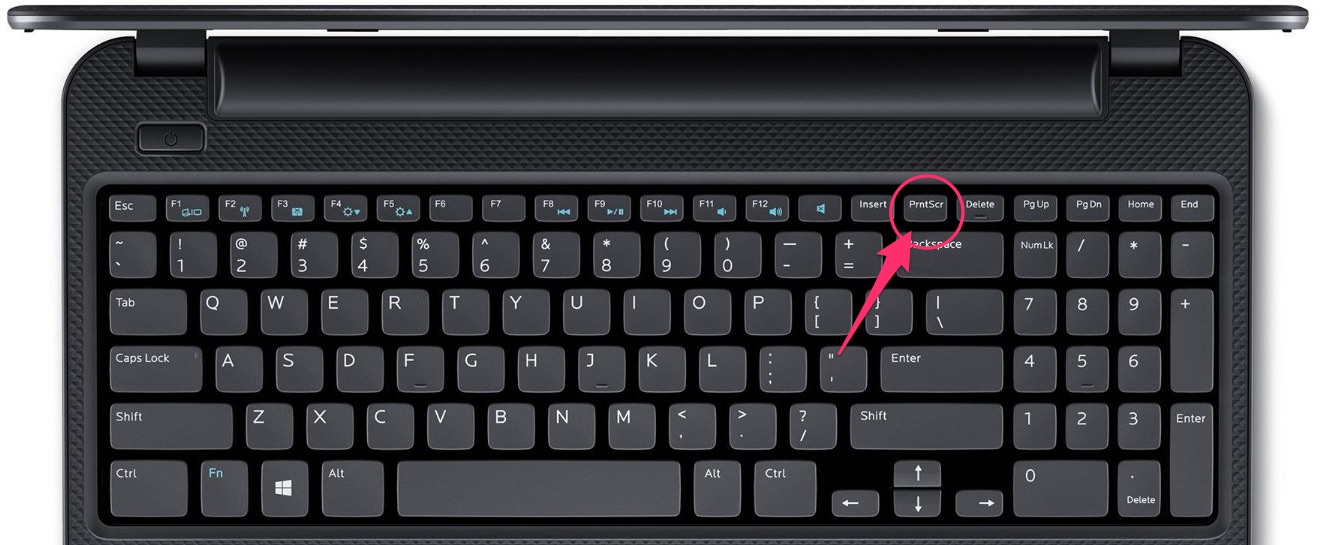
To take the whole screen, tap the “Print Screen” key once. Accomplishing this will take a screenshot of anything which is presently shown on your screen and copy the photo to the clipboard. To Take a Particular Window Screenshot, launch the particular program or explorer window for which you need to take a screenshot. Then, select the window which you need to capture.
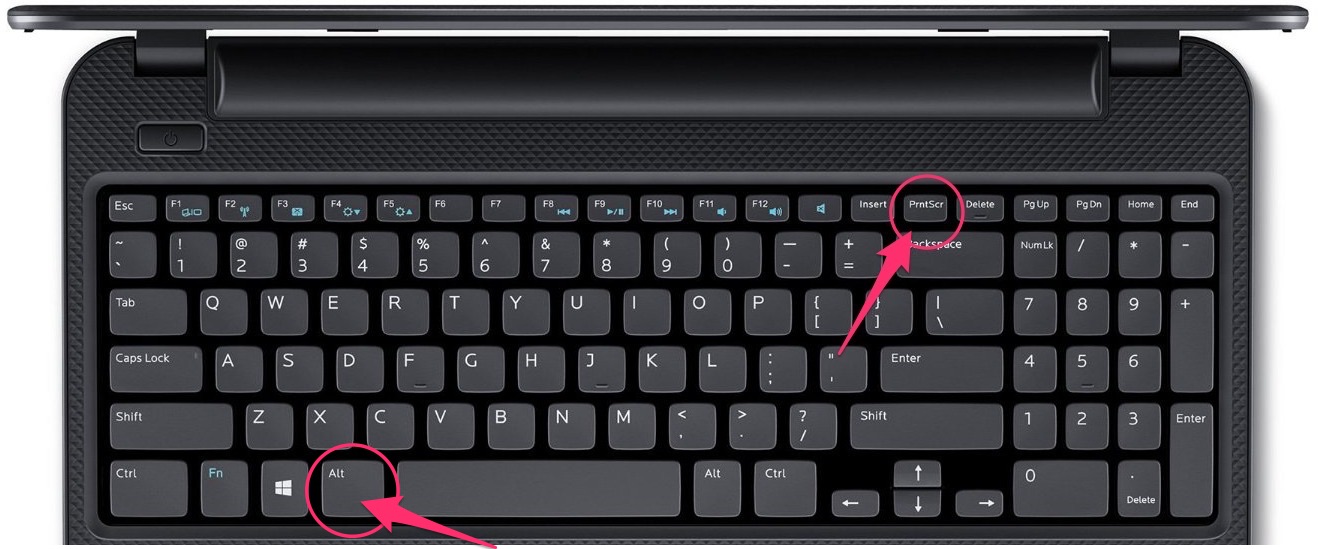
Hold down the “Alt” and press the “PrntScrn” button. Then, release both keys. At this moment, the screenshot will be copied to the clipboard.
Note: On some Dell laptops, you have to use the “Ctrl + PrtScn” or “Fn + PrtScn” or “Alt + Fn + PrtScn” combination keys instead.
Now, just open the Paint program and paste it in a new image of Paint. You can use Ctrl + V buttons or click Edit >> select Paste to paste the screenshot on Paint.
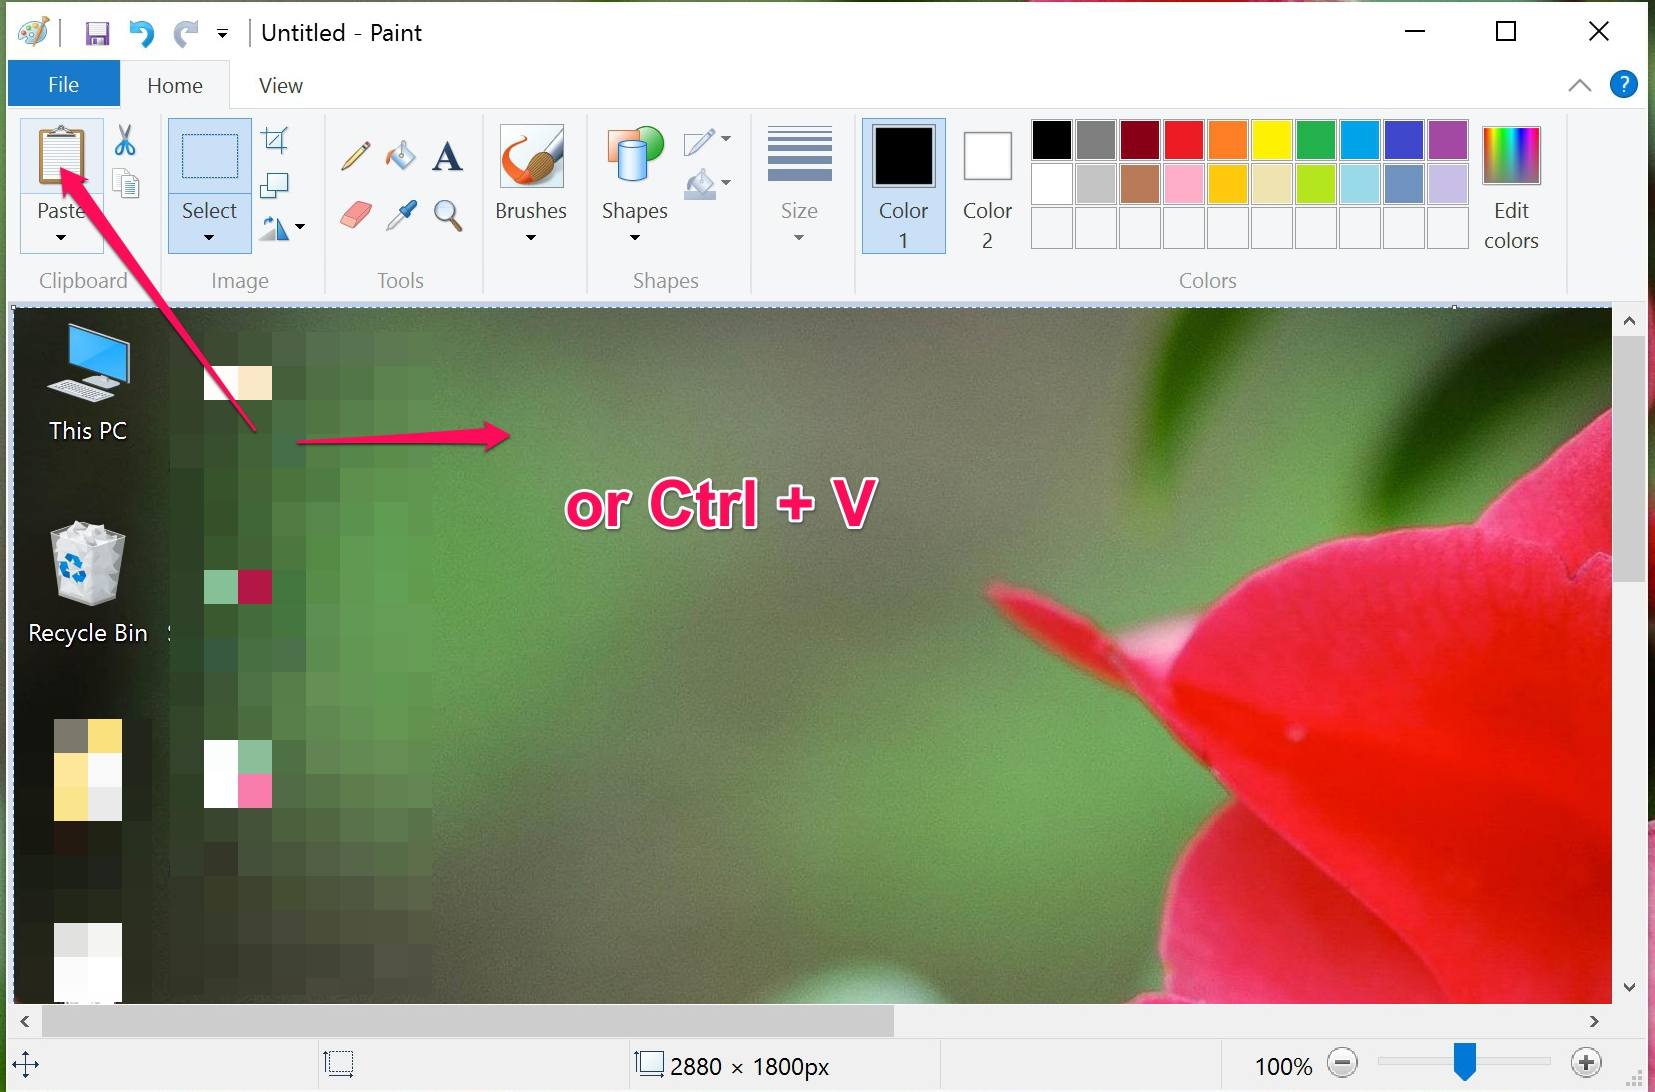
Finally, you can save your screenshot as the format file you want such as .png, .jpg, .bmp
More: You can also paste your screenshot into Microsoft Word. Open Word program and make a new document. Then press Ctrl + V or right-click on the area which you want and then select Paste to paste the screenshot into the word file.
Using The Snipping Tool
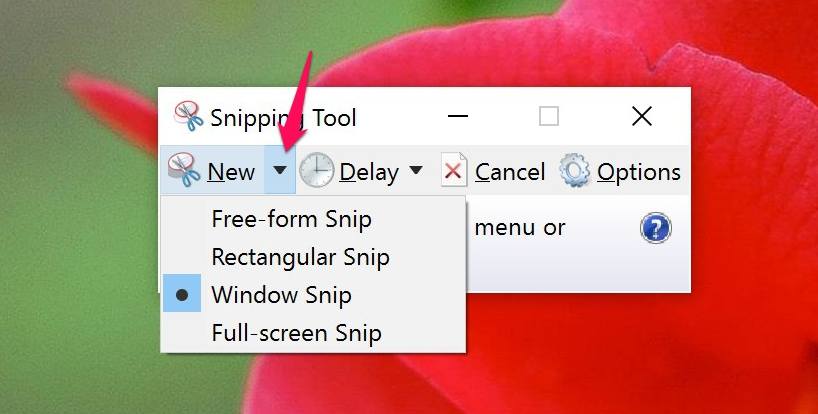
If you are using the Windows 7, Windows 8.1 or even Windows 10/Windows 11 on a Dell, you can use the Snipping Tool which can help you take a screenshot, see the detailed guide here.
2. Using the Browser Extension
Sometimes, you will need to take a screenshot of an entire webpage of Chrome and Firefox, using the extension on Chrome and the add-on on Firefox is a great way to do. If you don’t make sure the way to do, click here.
3. Using Third-party Software
Jing and LightShot are two of the best free screen capture software which can help you quickly to take a screenshot on a Dell desktop and Laptop. However, you can check more software here.
How to Taking a Screenshot on Dell tablets
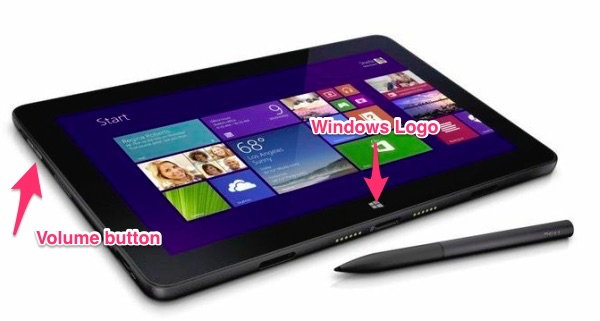
To take a screenshot on a Dell tablets which are running Windows 10/11, just hold down the Windows Logo button and the Volume Down button at the same time.
Then, the screen will flash, and you will hear a shutter sound. The screenshot was taken. If you don’t make sure the locations of Windows Logo button and Volume button on your Dell tablets, you can see images below: Dell Venue 7
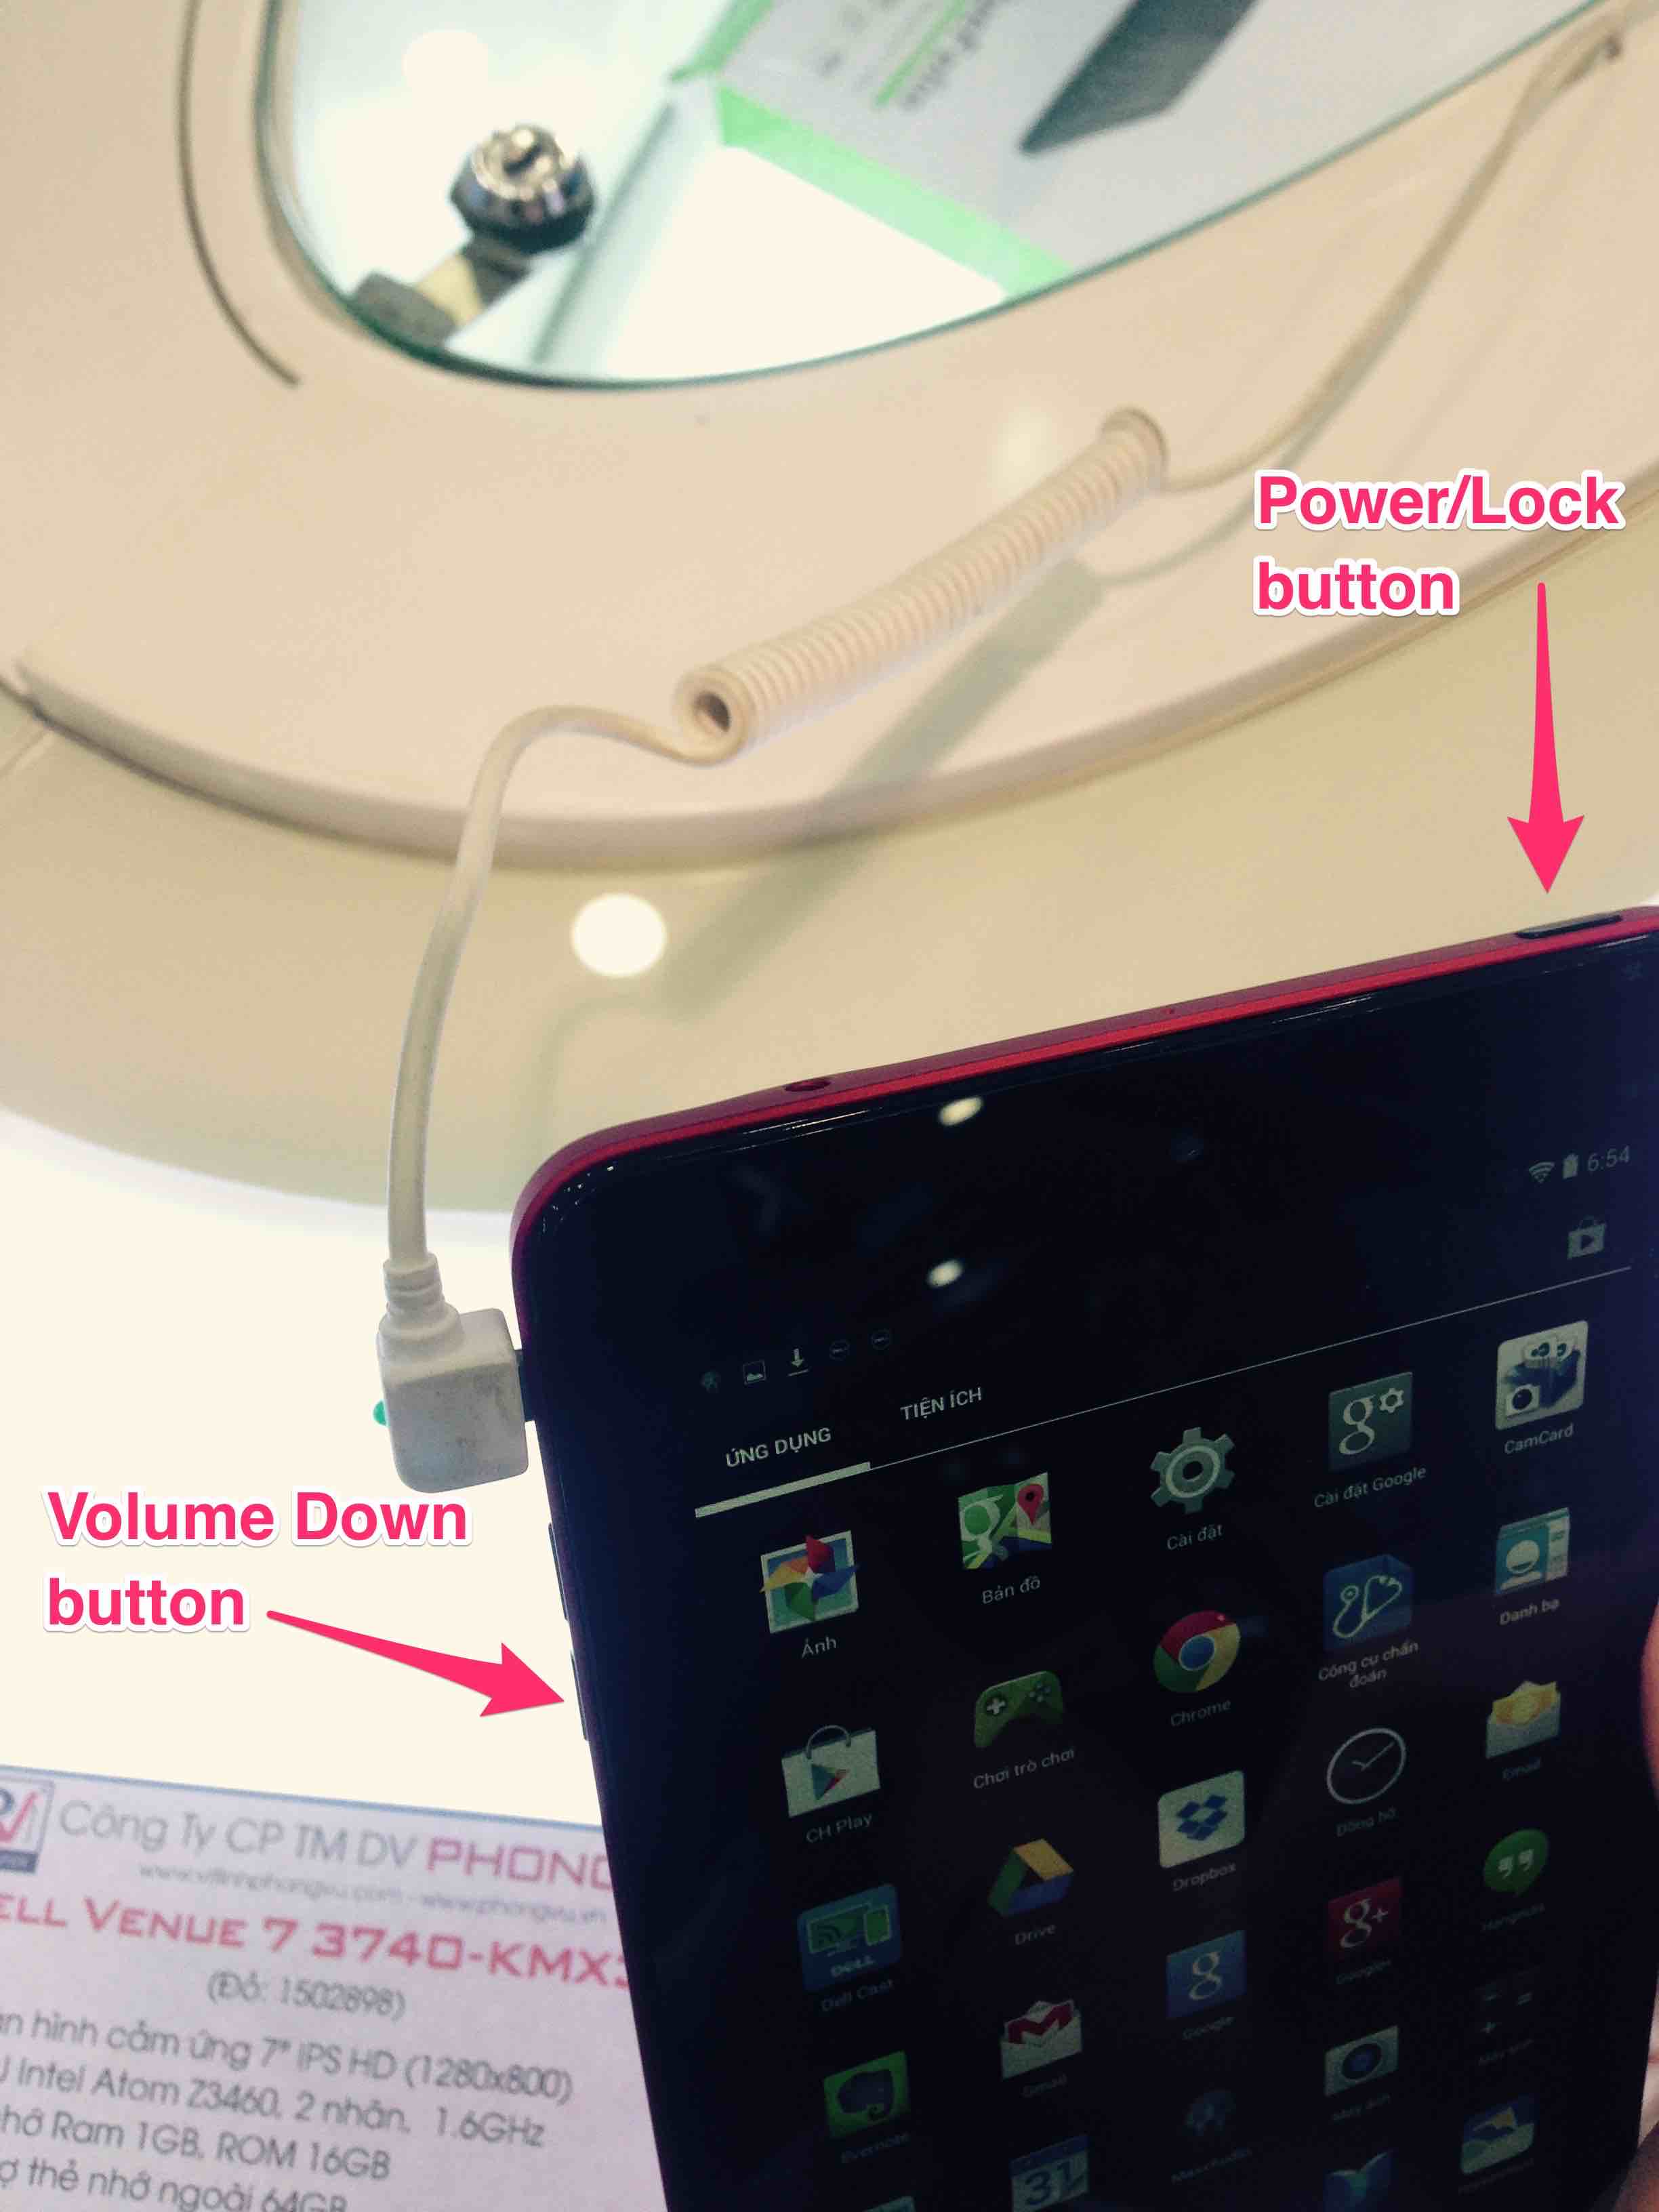
Dell Venue 8 Pro
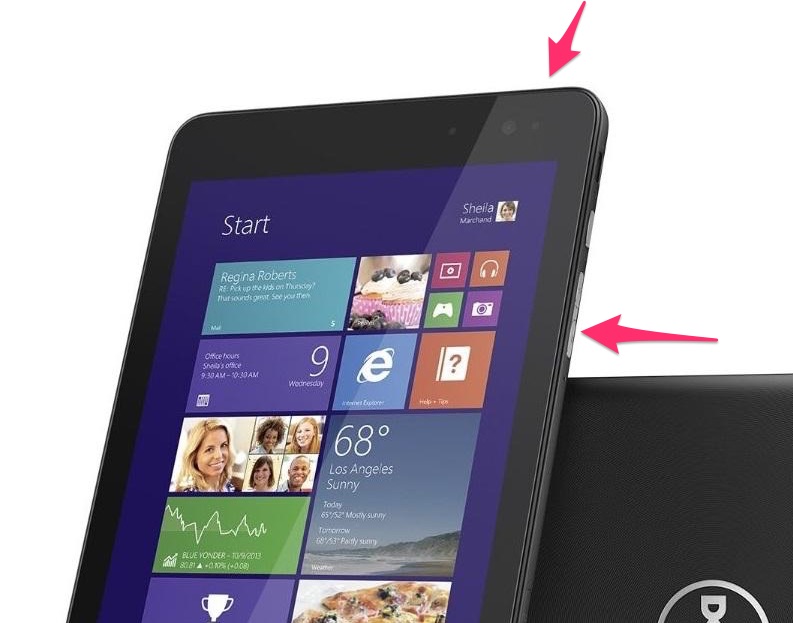
Dell Venue 11 Pro
