Taking a screenshot on iPhone 6s or 6s Plus is a great way to share top scores from your games, or show a problem and taking a screenshot on iPhone 5, 5s, or 6 hasn’t changed much coming from the previous release.
There is something to note that the iPhone 6s and 6s Plus have relocated the Sleep/Wake key to a new place, but it’s still straightforward.

How to take a screenshot on iPhone 6 and 6 Plus
Using Home + Sleep/Wake keys
Step 1: Open the app or screen you want to screenshot.
Step 2: Just press and hold the buttons at the same time. (You need to make sure that you don’t need active Touch ID or Siri by accident while processing to take the screenshot.)
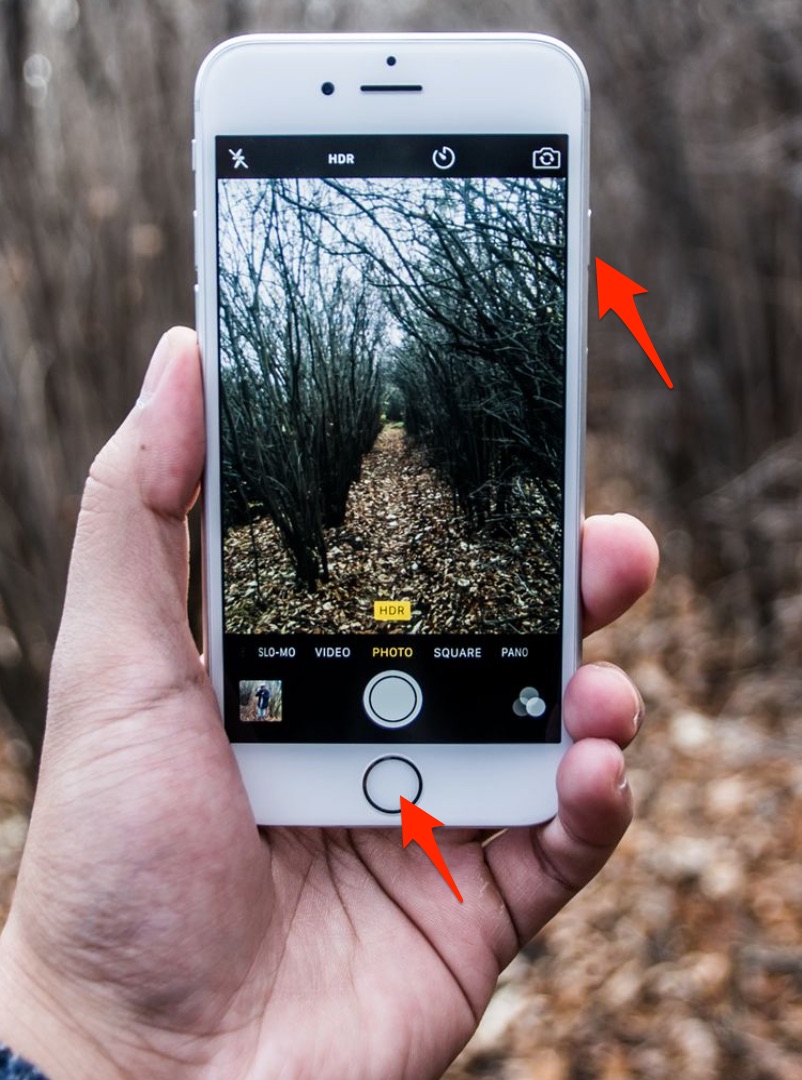
Step 3: The screen will briefly flash white and you’ll also hear the camera shutter sound (if your phone isn’t on mute).
The screenshot will automatically be saved to your Photos app in the Screenshot album (or Camera Roll if you don’t use iCloud Photo Library).
Using Assistive Touch
Step 1: You can quickly active the Assistive Touch by tapping on Settings -> General -> Accessibility -> Assistive Touch and switch Assistive Touch ON. The new semi-transparent icon will appear on your screen. This is the Assistive Touch.
Step 2: Take a screenshot from Assistive Touch. Tap on the AssistiveTouch icon > Tap on Device > Tap on More. Tap on the Screenshot option, and the screenshot will be taken and automatically saved to your Screenshot album in the Photos app
You can see the video tutorial below:
See your screenshots
Keep in mind that you can see all your screenshots from the Screenshot album in the Photos app on iPhone 6s and 6s Plus.
You can open the Photos app by going to the Home screen and tapping on the Photos app. From there, go into the Albums tab and find the Screenshots album. You can then see or edit the screenshot using any free editing apps on your device.

